FOR~GO
(For Geeks Only)
By Joe Callison
10 June 2018
(Updated 9 September 2021 to replace a broken link)
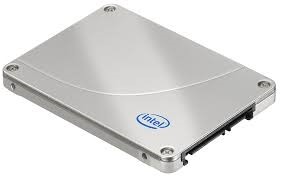
One of the most cost-effective ways to improve the performance of a computer is to migrate the operating system from a mechanical rotating hard drive to a solid-state drive. Accessing and reading data from a solid-state drive can easily be at least 30% and up to 100% or more faster. With prices as low as $25 for a 120GB SATA type, it is the most bang you can get for your buck and is relatively easy to do. Here is the easiest method for any desktop or laptop computer with a SATA type hard drive:
1. Determine the capacity of SSD you will need. Check the current number of GB used on your hard drive local disk C partition containing the operating system. You will want an SSD with approximately double that amount to allow room for future operating system updates and programs to be installed. You can reduce the size required by moving user files (documents, pictures, music, movies, downloads, etc.) to another location such as a flash drive, external hard drive or even another partition of the existing hard drive. Now would also be a good time to scan the whole drive for viruses and malware and clean up any unnecessary files before migrating.
2. Install the SSD. Power down the desktop computer, disconnect the power cable if there is no switch on the power supply, and install the SSD. A SATA data cable and a spare power connector will be required for a desktop PC. Mounting hardware is available for securing 2.5-inch SSDs in larger drive bays but are not really required. I just tuck the SSD and cables out of the way in an empty drive bay. A laptop will require a SATA to USB adapter for temporary connection of the SSD as an external drive while doing the migration as outlined here. These are available for under $20.
3. Download, install and run the free version of MiniTool Partition Wizard. The existing hard drive should appear as drive 1 with one or more partitions defined and the SSD as drive 2 without any partitions defined. Click on Migrate OS to SSD/HD. Go through the steps of the wizard and then click Apply to begin the process. Since the program is running on the same disk that is being migrated, at some point it will say that it can’t continue because the disk is in use. Click the option to continue on Restart and the program will resume after restarting in a text only mode
4. Set up the SSD as the boot drive. Access the bios or UEFI settings of the desktop computer to select the SSD as the first disk for the hard drive boot option. For a laptop, simply replace the hard drive with the SSD. Remove the laptop charging cable and battery (or disconnect the battery if not removable) before replacing the hard drive with the SSD.
5. Restart the computer. The computer should boot from the SSD. It is unlikely but possible the boot may fail, and a Startup Repair may need to be run, or the SSD may need to be connected to the SATA port that the hard drive was connected to in a desktop computer (swap SATA cable connections with the hard drive and try again). I have migrated computers with Windows XP, Windows 7, and Windows 10 and have not had any failure to boot.
If you have made a lot of hardware changes to the computer previously, it is rare but possible that the migration to SSD will put you over the limit and cause the operating system or other installed program license to become inactive. If reentering the product key does not work, this may require contacting technical support to explain what was done and it should be resolved. For QuickBooks problems, see the link for restoring the entitlement data store in the following:
https://qbo.support/how-can-i-migrate-qb-pro-to-a-ssd-drive/
The operating system on the hard drive will remain operable by simply changing the boot settings for the desktop computer or swapping drives in the laptop. It can be kept for a backup of the operating system if desired or used for another purpose such as storage of user files.
There is other partition manager software, drive cloning software, and backup and recovery software that can accomplish the operating system migration, but the MiniTool Partition Wizard has been the simplest and best method I have used.
https://www.partitionwizard.com/free-partition-manager.html
You can optionally create a boot CD with the software and run the program from the CD to do the migration if the computer has a CD drive, but since it was not necessary, I chose not to include that step in the instructions above.
MacOS is a little more challenging because of the limited availability of free software that will work with the Apple file structures and models of SSD that have been proven to work with specific Apple computer models. Also, Mac desktop computers are typically sealed shut with adhesive tape, requiring special tools and replacement tape that are not easy to find except by searching the internet. I have successfully accomplished migration on a mid-2012 model laptop that still used screws for access to the hard drive. For the Mac desktop, an SSD in an external drive enclosure with a Thunderbolt or USB 3 interface may be a good alternative to opening the computer.