GEEK FREE
By Joe Callison
18 September, 2019
If you use the Snipping Tool in Windows 10, you have probably seen the message from Microsoft about it moving and suggesting you try Snip & Sketch: 
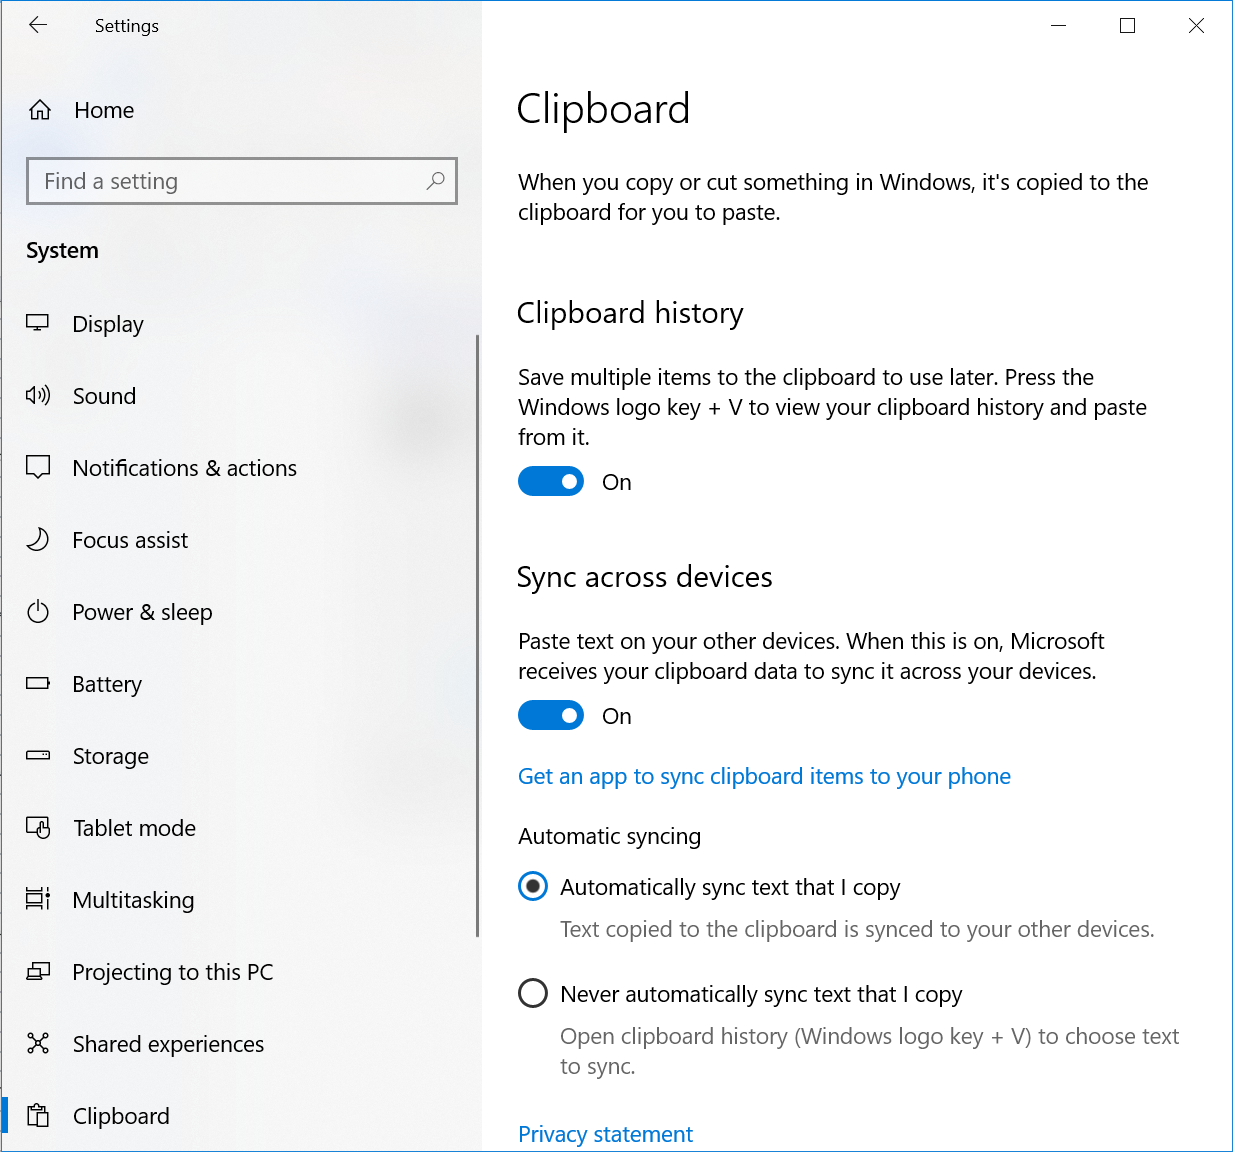
The Snip & Sketch app does offer some nice features if you enable them in the Clipboard settings, found under Settings, System, Clipboard:
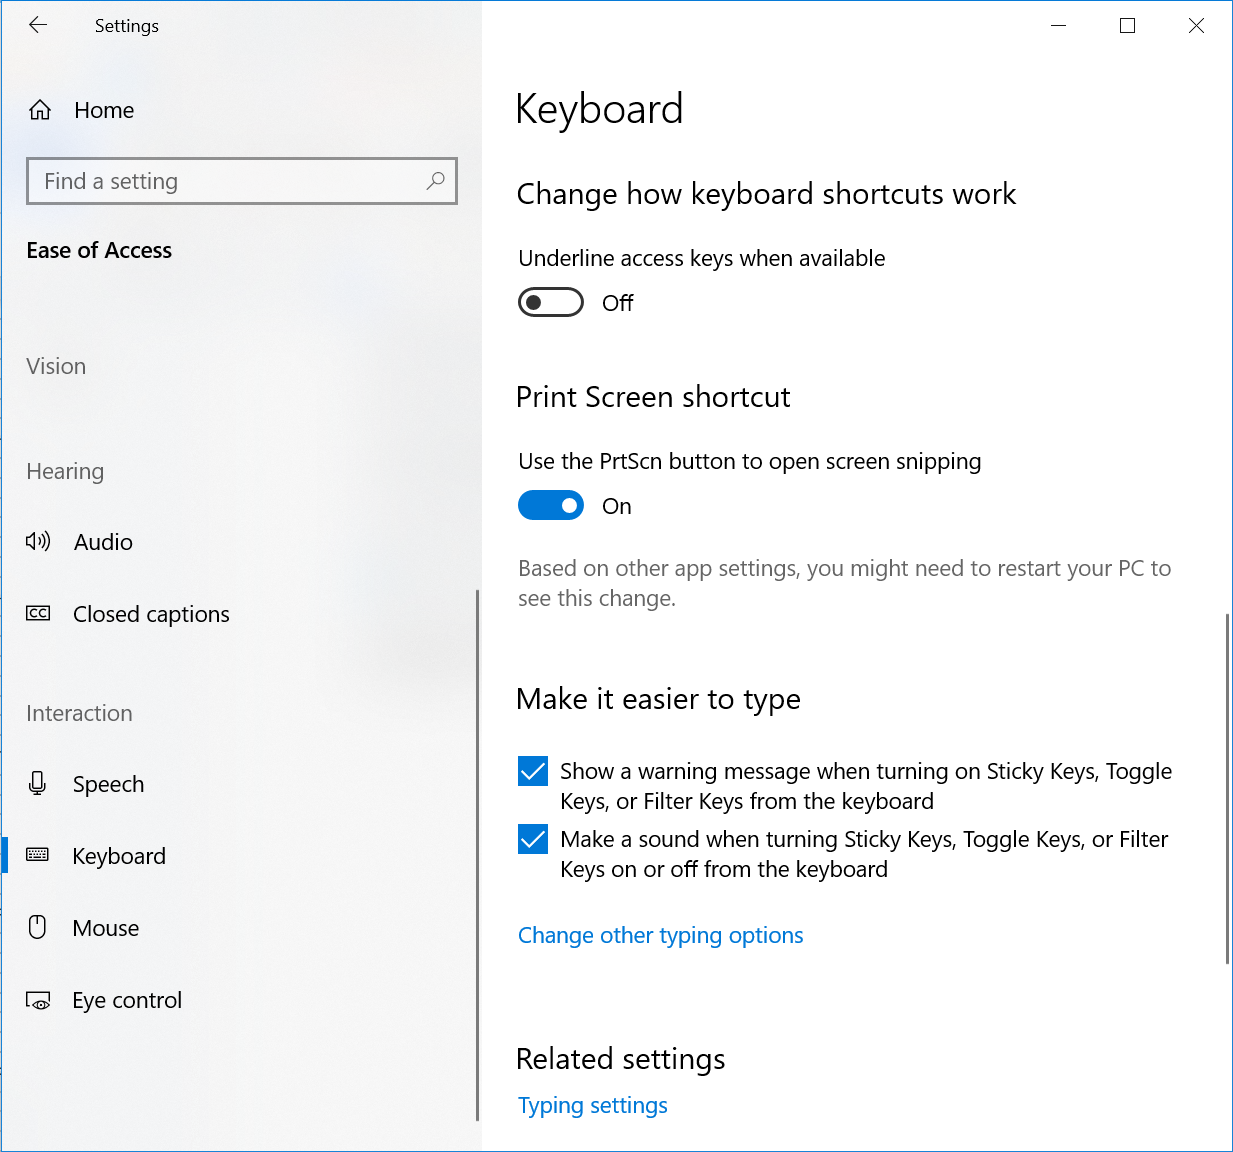
Another nice setting is to enable your keyboard print screen button to open the Snip & Sketch app. This is done by going to Settings, Ease of Access, Keyboard and turning on the Print Screen shortcut:
When you use Snip & Sketch, there are icons along the top to select the type of snip: rectangular, freeform, window, or fullscreen. After making a selection, just clicking anywhere on your screen will make the snip and send it to the clipboard. With the clipboard history turned on, all of your snips will be saved, and you can call them up when you are ready to paste one or more in another app by using the Windows key + V shortcut to open the clipboard viewer and then click on the image you wish to paste.
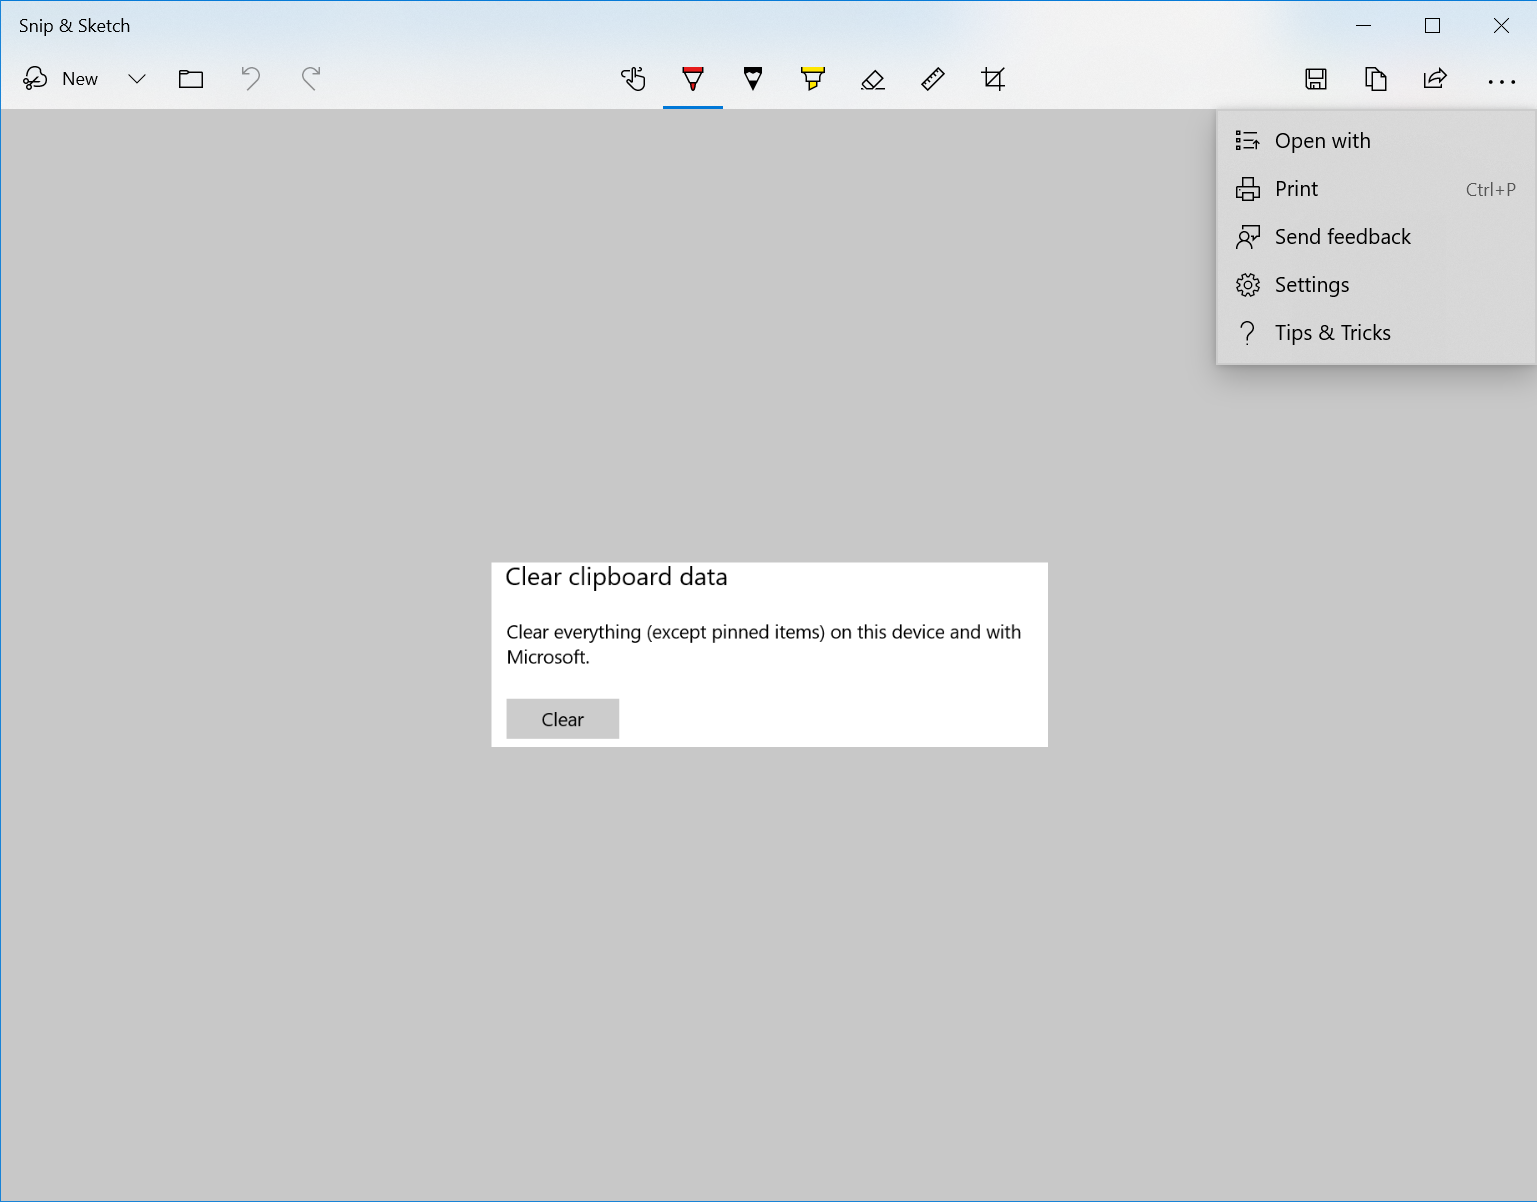
If you want to clear your clipboard history, there is a button to do so under Settings, System, Clipboard, Clear clipboard data:

If you open the Snip & Sketch app instead of using the print screen button to make a snip, there are more features available. After making a snip, there are several markup tools to highlight, add text, write/draw or crop and the ability to save, copy, print, or share the snip. Note that a modified snip becomes a picture image (JPG) if you choose to save it. Copy will send it to the clipboard, but there is also a setting that can be turned on to automatically send annotations to the clipboard. Settings and tips are available in the Snip & Sketch menu.
Try Snip & Sketch, I think you will like it when you get used to it. All of the screen copies in this article were done using Snip & Sketch.